Mirliton How-To Tips
Search tips by keyword:

Using a Bamboo Stake to Test Soil Moisture
I realize that this sounds like a strange idea, but experienced container plant experts have been using wooden skewers and chopsticks to gauge soil moisture for years. The principle is simple; moist particles of soil adhere to the wood. A clean skewer means the soil is too dry, a muddy skewer means too much moisture, and a stake flecked with large soil particles means the moisture is fine. The same principles apply to using a large bamboo stake in your raised bed or garden.
The two methods gardeners often use are the second-knuckle method and the electric meter method. In the knuckle method, you insert your finger down to the second knuckle and feel if you feel moisture at the tip. That gives you a good reading of the soil moisture in the first two inches, but the mirliton root zone is much deeper than that. You need a reading of soil moisture from 1-6 inches, and a finger can’t do that.
The other popular method is a sleek moisture meter. But there are several problems. The probe does not tell you what is happening at all levels. It rounds it off to one reading. Plus, the meter is set in the factory to a specific soil type. It has no idea about the unique qualities of your soil, such as porosity, particulate size, clay content, and amendments. That makes for unreliable readings. I think they are useful with house plants, but not with gardens.
The bamboo stake uses your senses and can adjust to any soil conditions. Look and feel are important gardening tools. (A bamboo stake will work for raised beds. But the most accurate method to prevent overwatering or underwatering your mirliton is the inexpensive stainless steel soil sampler.
Steps for Using the Bamboo Stake Soil Moisture Gauge:
- Use a standard ½-inch diameter bamboo tomato stake with no lacquers or plastic. Coverings can throw off the measurements. Make sure the stake is dry. I leave mine out all day.
- Select a place about 6 inches from the plant base. You can choose a different place each time if you are afraid of harming the roots.
- Shove the stake straight down about 6-12 inches and wait a couple of seconds, then pull it up quickly.
Read the stake:
- A relatively clean stake means soil moisture is low, and you need to water. (photo 1)
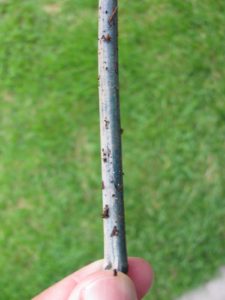
- A slightly smeared or dirty stake, particularly in the first two inches, means the plant has more than enough available moisture and needs no water. (photo 2)
- An evenly distributed number of soil particles (crumbs), the length of the stake means the plant needs no water. (photo 3)
Wipe off the stake and set it aside to dry.
Learn from the stake:
Make a mental note of what the stake looks like each time you test or take a photo. You will see that it gives you a graduated reading–each particle of soil represents the available moisture at that specific level. The bottom of the stake will show the moisture at the deepest level. You can learn from the tests: Do the test the day after you water or when it has rained so you see what good soil moisture looks like on the stake.
If you want a more precise moisture reading that uses both appearance and feel of the soil, upgrade to the metal soil sampler

FIg. 1. Clean bamboo stake means low soil moisture and you need to water the plant.
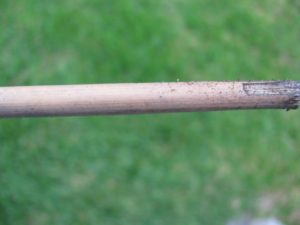
Fig. 2. A light coating of soil particles indicates good soil moisture. Note that the slightly muddy tip of the stake means the soil is getting saturated at the deepest level. No need to water.
Evenly distributed flecks (crumbs) of soil indicate good soil moisture at all root zone levels. No need to water.
How to test compost and manure for herbicide residue
Many gardeners attribute plant failure to manure or compost that may have been contaminated with Grazon or other herbicides. A professional laboratory test is too expensive for the average gardener, but there is a simple, inexpensive test you can do at home. You can do it before using the compost or manure, or after you have already planted:
Managing Spider Mites and Mealybugs

Female red spider mite.
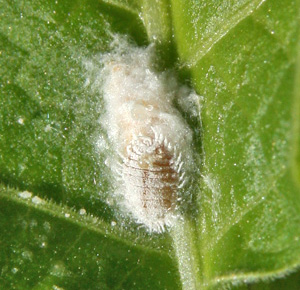
Mealybug and nest.
Spider mites and mealybugs tend to plague mirlitons that are planted in containers, especially when kept indoors during overwintering.
You can manage mealybugs by soaking a cotton swab with 70% isopropyl rubbing alcohol and dabbing it directly on the bugs. Alternatively, you can dilute the alcohol with water at a 1:10 ratio (one part alcohol to 10 parts water) and spray it on both the top and bottom of the leaves. (Sevin claims to control mealybugs, but there’s evidence that it is not as effective as alcohol.)
Mites can be controlled with the same alcohol spray, neem oil, or insecticidal soap (follow the instructions on the label).
Sprays will only kill the living mites, so you may need to repeat the spraying process weekly for a few weeks.

Red spider mite clusters.
Click here for a short fact sheet on how to identify signs of mites.
Click here for a fact sheet on mealybugs.
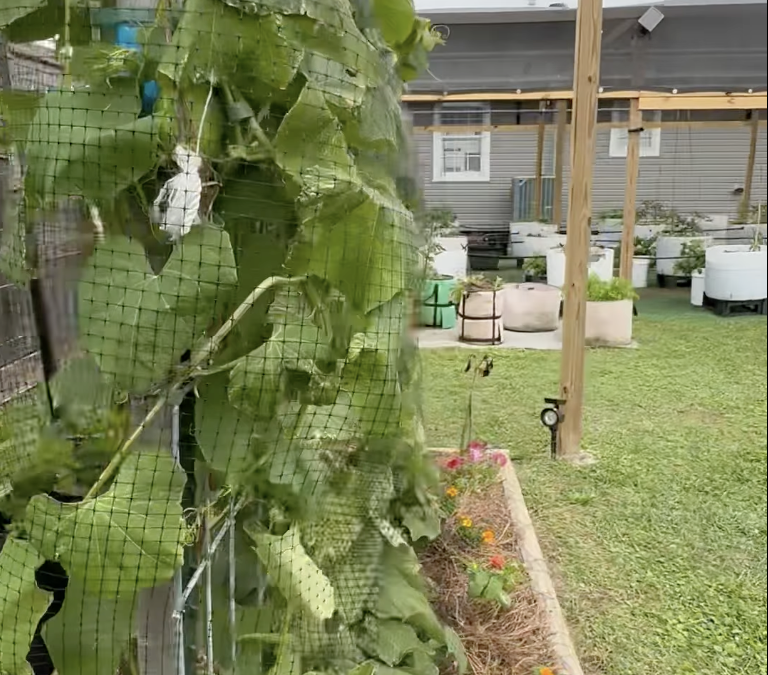
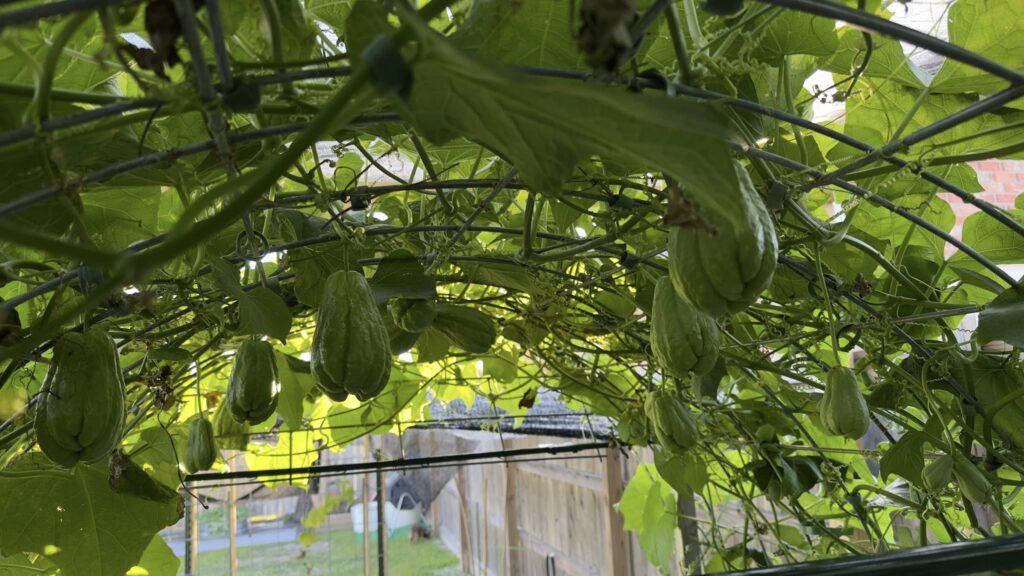
Secure Your Vine From Winds and Hurricanes With Netting
Strong winds and hurricanes can shred a mirliton vine and stress it enough to delay or even stop flowering.
Michelle Impastato Glore discovered an ingenious way to inexpensively and quickly protect the vine from winds: netting. It’s the most effective way to protect your vines from wind damage–even in hurricane winds.
With young plants, she sandwiches them between two layers of netting and secures it to the trellis on both sides with clips. She pushes the tips of the clips through both sides so they hold the vine snugly but not so tightly that it breaks the stems.
To protect her large, mature vine, she wraps the entire vine with netting on both sides and secures it with velcro and or plastic tape.
Both vines survived gusts of 20 mph, and the large vine should have sustained gusts up to 70 mph.
The netting comes in many sizes at Tractor Supply and other stores, including this large roll for big vines.
Watch the video here of Michelle’s vine after 70 mph gusts. The vine had grown through the netting, so she had to cut holes in it before removing it.
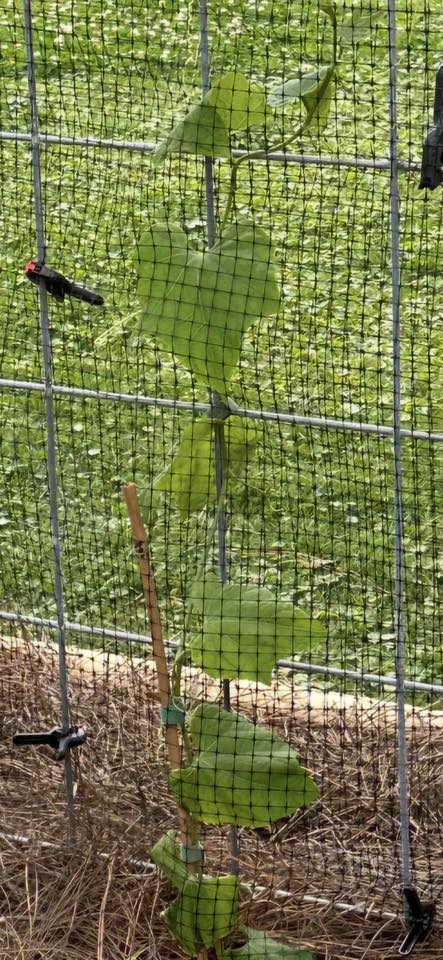
New plant sandwiched in with netting clipped to trellis.
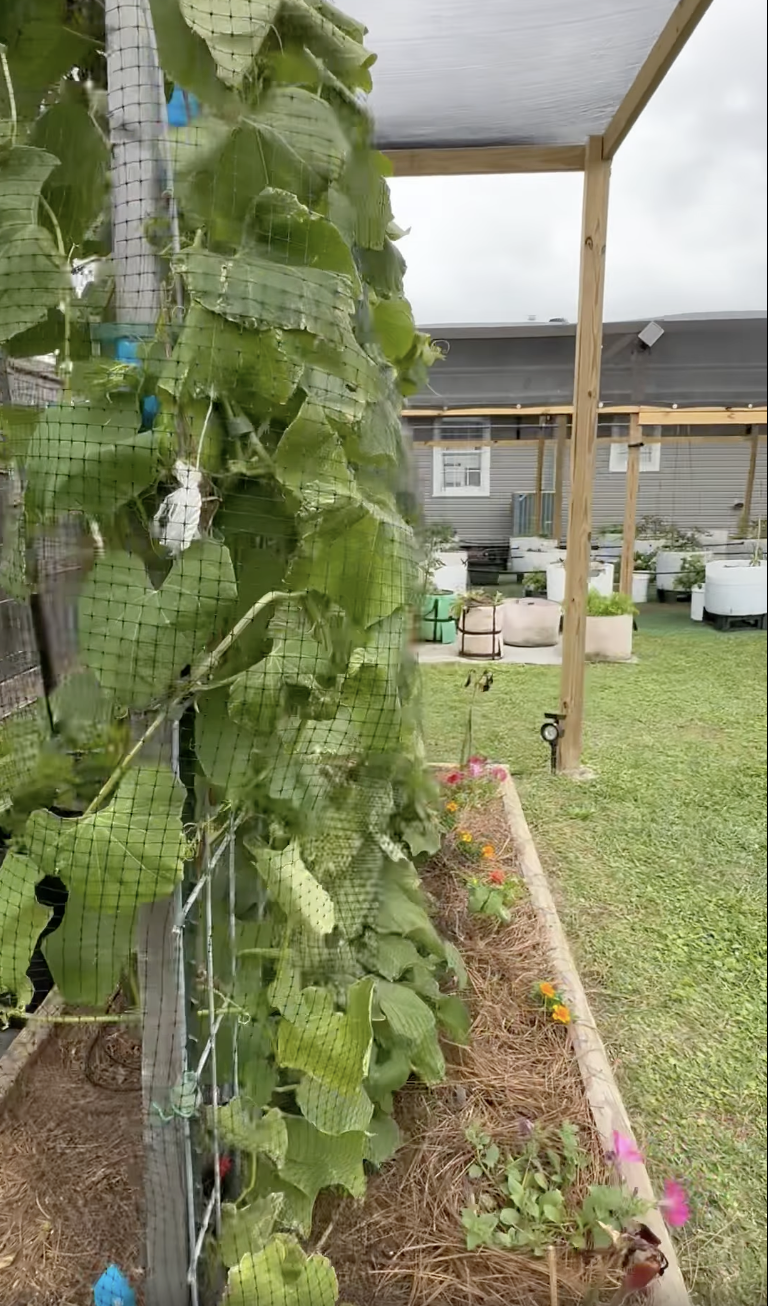
Netting wrapped around large vine.
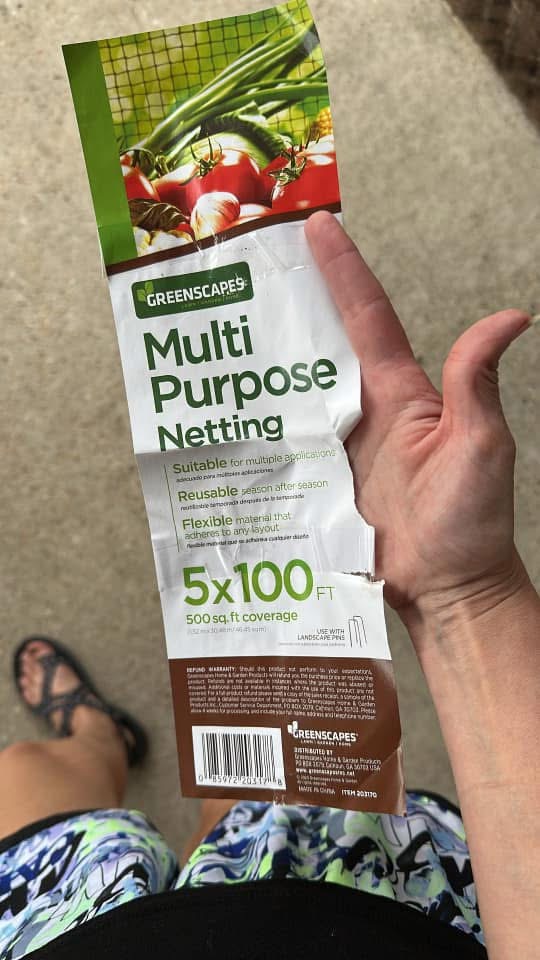
Garden netting.

Quick Guide for Growing Mirlitons

Mirliton is the Haitian-French word for the Louisiana chayote (Sechium edule) vine that originated in Mexico and Central America. Haitians brought it to Louisiana in the 19th century, and it evolved over 200 years, adapting to the climate, altitude, and diseases. It’s a self-pollinating climbing vine that makes both male and female flowers on the same vine.
How to Grow It:
1. Choose the right seed
Mirliton seeds can’t be dried and saved, like tomatoes and grains. The entire fruit must be planted. We recommend that you use only certified Louisiana Heirlooms for two reasons. First, Louisiana heirlooms grow and produce well in our climate and are naturally resistant to most diseases. Second, imported chayote–sold at grocery stores and online–are not screened for diseases and can introduce new diseases that could eventually destroy our heirloom variety. Avoid uncertified seeds and plants sold at nurseries, farmers’ markets, and roadside stands.
Read about imported chayote here.
Find a list of Certified Mirlitons here.
2. Sprout It.
Place the seed in a warm place, such as on top of the refrigerator, until it sprouts a stem. If it does not sprout within a few weeks, here is an easy way to speed up the process.
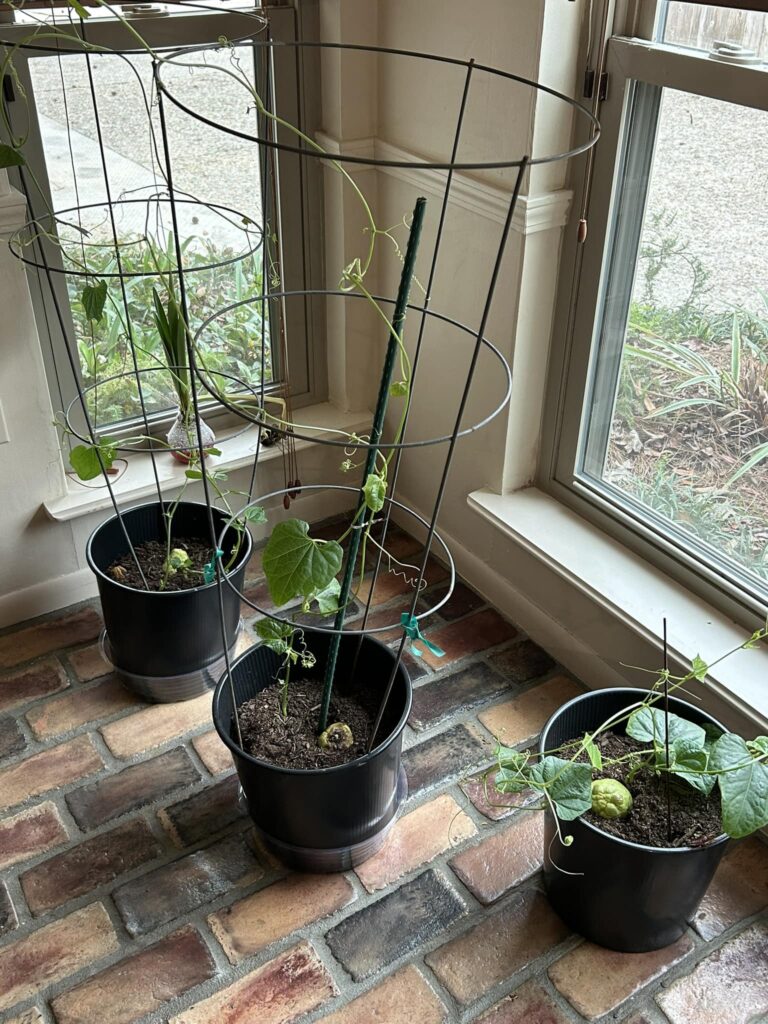
3. Container-Plant it:
Once the seed sprouts, we recommend overwintering it in a 3-gallon container. This will help it develop a good rootball for transplanting and help you get an additional crop in the spring. Mirlitons need 110 days after planting to set fruit, and by container planting it in December, it may set fruit in May. Find everything about sprouting, container-planting, and watering a new seed here.
4. Choose a Plant Site:
Select a well-drained area away from roofs for your plant site. Mirlitons don’t grow well in saturated soil–it can even kill a new plant. Till up a 4’ x 4’ patch to plant in. If you have poor or clay soil, dig a pit 2’x2’x18” and fill it with a mix of garden soil, compost, and manure to give the vine a good start. Mound a small hill of soil on top of the pit in which to plant the mirliton (so it drains well). The planting site does not have full sun because mirlitons are “sun seekers” and will grow along the trellis until they find sunlight. Here’s how to prepare the planting site.
If you don’t have a well-drained area, you will need to build a large, deep, raised bed.
Here’s how to build a bed that drains quickly and keeps the correct soil moisture.
5. Build a Trellis:
Build an overhead trellis that allows you to both shade and frost-protect the vine. The trellis material must be the correct gauge and mesh. Mirlitons will climb almost anything, but a proper trellis makes protecting and harvesting easy. Read here how to select the appropriate trellis material. Make sure the trellis has a structure that will support a shade cloth or tarp when needed (PVC hoop or wooden frame).
6. Shade it:
Buy a shade cloth before you even plant. The last several summers have taught us that mirlitons can die in intense heat waves without a shade cloth–especially with a first-year vine. You may need a shade cloth starting as early as July. They are inexpensive and last for years. Read about them here.
7. Transplant it:
Transplant your container plant into your ground site or raised bed after the last frost in March. Be prepared to cover it with a bucket or tarp in case of a late frost.
8. Fertilize It:
Any balanced (8-8-8) chemical fertilizer will work, but slow-release fertilizers such as manure work best. Fertilize with a couple of tablespoons when you first plant and then once a month as needed. As long as the vine is green and growing, it’s fine. Don’t fertilize after July, or it will disrupt flowering. Read about fertilizing here.
9. Water It:
Water it at the ground level–overhead watering spreads plant diseases downwards. Mirlitons don’t need much watering in the spring, and that’s the time most people are likely to over-water. The simplest way to prevent over-watering is to use a soil sampler. The inexpensive device will also tell you if your soil is too dry during a heatwave or drought. If you have a raised bed, you can also use the bamboo stake method to sample soil moisture. Set up a regular watering schedule throughout the summer. Once the vine gets going, the mirliton leaves will tell you if it has adequate moisture. This process is called guttation, and you can learn how to read the leaves here.
10. Scout It Daily:
The summer months should be a steady routine. Scout the vine daily for pests and disease.
11. Protect it from winds and Hurricanes:
Strong winds can batter a vine and disrupt flowering and fruiting. The most effective way to minimize wind damage is with netting, like here. You can also weave the vine into the trellis like here.
12. Protect it from diseases:
Two primary diseases affect mirlitons: powdery mildew (PM) and anthracnose. Powdery mildew is usually seen in the spring. It’s easy to identify and can be eradicated by spraying the vine with potassium bicarbonate, an organic fungicide. Read how here. The main summer disease is anthracnose. Fungicides are ineffective against anthracnose. But the good news is that anthracnose usually occurs in August, and the vine normally recovers by the fall. In addition, each time the vine gets anthracnose, it acquires more natural immunity to the disease. Read about how to identify it here. You can also submit photographs of plant symptoms to the Facebook group for help identifying and managing the diseases.
13. Protect it from Pests:
There are three main insect and animal pests. Read about how to manage them at these links: Vine borers. Stink bugs. Squirrels.
You can submit photographs of insects to the Facebook group for help identifying them.
14. Protect it from Frost and Freezes:
Mirlitons are “cold-sensitive” plants that can get damaged and frostbitten if the temperature drops below 42°. Sprinklers can protect against most frosts and extend the growing season into December. Read how here. Simply covering the vine with a tarp will also protect against most cold weather. But, the most reliable and effective protection against cold damage is temporarily tenting and heating the vine when needed. Growers who did this during the 6° freeze in 2025 saved their vines and harvested mirlitons all through the winter. All it takes is a tarp and a small heater. Read how to do it here.
15. Flowering and Fruiting:
Mirlitons are photoperiodic, which means the length of the day stimulates flowering. That occurs during the spring and fall equinoxes in March and September. It may take a few weeks after the equinox for flowering to start, and a cold snap will help. Once the female flowers are pollinated, the fruit will mature within two to three weeks. If you don’t see bees pollinating, you may have to hand-pollinate–see how to do it here.
16. Cut back or Not Cut back the Vine?
In the past, the tradition was to cut back the vines at the end of the fall harvest. We don’t recommend doing that now because the weather patterns—increased summer waves and fall hurricanes—have often ruined the fall crop. Instead, we recommend extending the growing season for several months by temporarily tenting and heating the vine after the fall. If you temporarily tent your vine, you can grow mirlitons through January before having to cut it back. Read how here.
Additional “How-To” Links:
Growing mirlitons in a cloth gro-bag
How to grow Mirlitons in a large container.
How to water a new seed in a 3-gallon container
Getting your Mirliton to Sprout Quickly
Sprinklers for Quick and Easy Frost Protection
Protect Vine From Winds and Hurricanes
How Mirliton Leaves will tell you they have enough water
How to plant Mirliton Sprouts in May or June
Managing Spider Mites and Mealybugs on Container-Planted Mirlitons
How to test compost or manure for pesticide residue
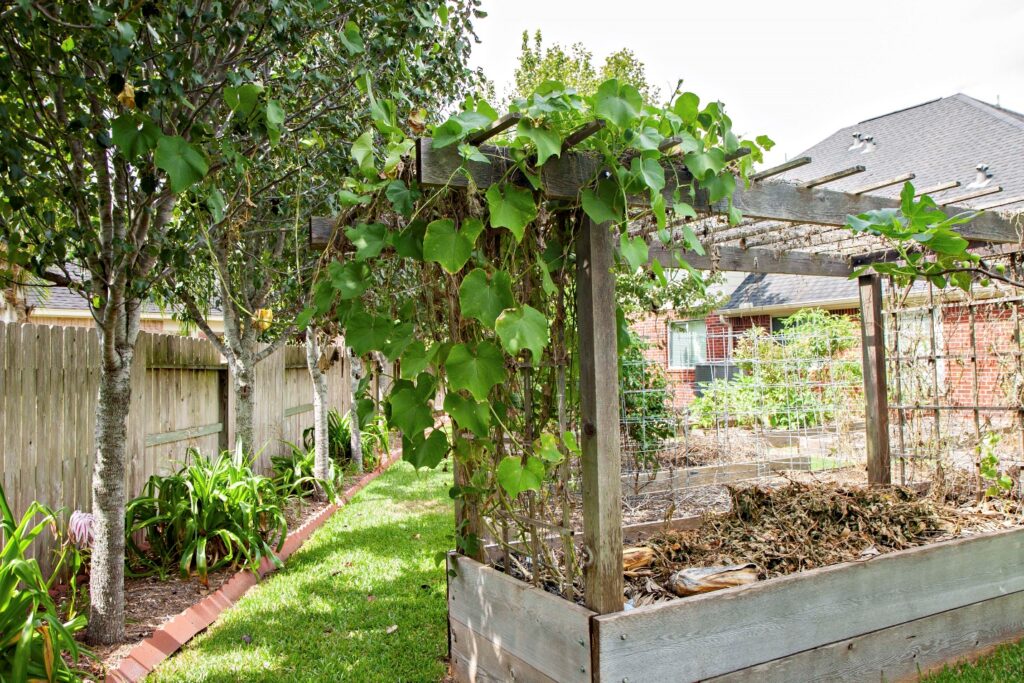
The Ideal Raised Bed: Deep and Wide

Tedra Erikson Stanley’s Raised bed
Many people’s yards have poor soil or soil with inadequate drainage which makes mirliton growing difficult. Either their soil gets overly saturated or has a high clay content and does not drain well. Raised beds are the solution.
But growing mirlitons in a raised bed requires special planning–it’s not like growing tomatoes or bell peppers. Mirlitons “hate to get their feet wet.” If the soil in the bed gets overly saturated, it will stress the vine, cause disease, and disrupt flowering and fruiting. They also get stressed by excessively dry soil.
The solution is a large, deep bed that moderates the changes in soil moisture and simulates ground planting. The ideal bed is a large, tall bed, 4’ X 8’ and 12-18 inches deep. Make sure to till the soil beneath the bed before installing it. You can make the bed with concrete blocks, wood, or galvanized steel. It doesn’t have to be quite as large as some of these images, but the larger and deeper the bed, the more likely that your vine will survive intensive rains and droughts.
Beds that sit on top of saturated or clay soil will not quickly drain into the soil, so you will need a lateral outlet so excessive rainfall moisture can drain out the sides. If you use a double stack of concrete blocks (below), it will allow the water to drain from the bed laterally. If you are using wood, it’s best to drill holes around the perimeter at about 4” above the soil line or leave a crack between the boards. Or you can bury a corrugated drain pipe in the bed and cut release outlets on the ends (photo below).
Finally, and most importantly, add a structure on top of the bed to place a shade cloth in the summer and tent the vine with a tarp in the fall to protect against frost/freeze. (photo below) If you are in an area that gets high winds, build the trellis and shade/tent structure so that it is relatively secure and the vine does not get traumatized.

Concrete block raised bed by Michelle Landry
Mirliton raised bed.

Raised bed with hoops for shade and tarps
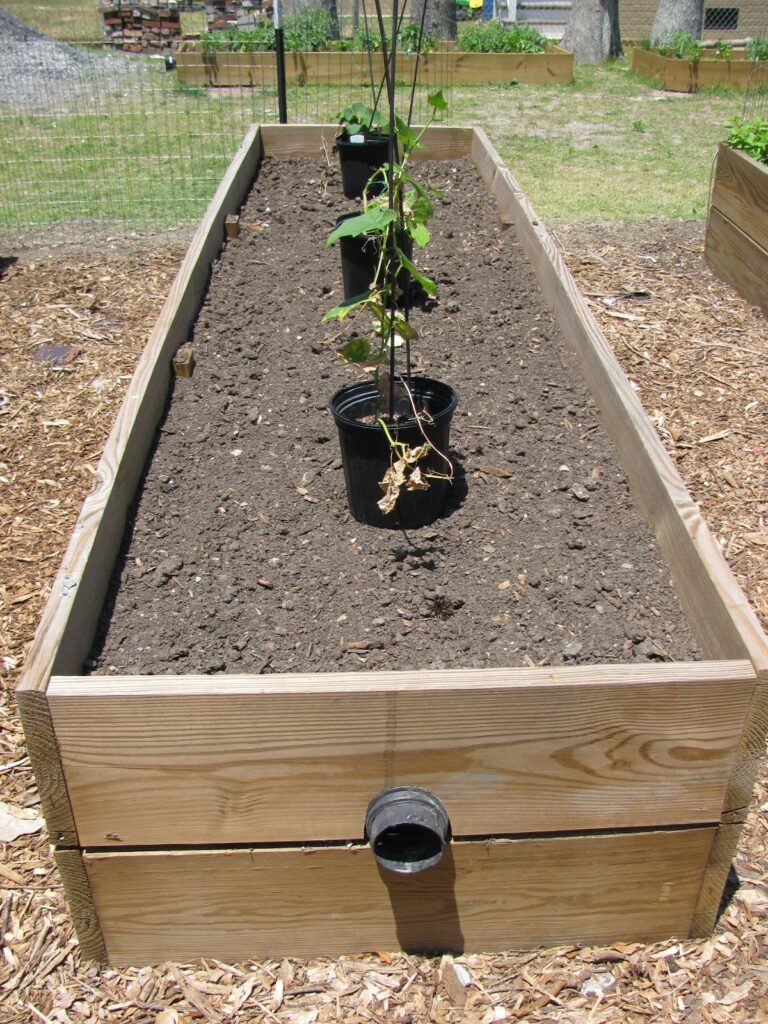
Raised bed with corrugated pipe drain
Tedra Erikson Stanely’s Raised bed
Aisha Elwood’s metal raised bed with shade structure

The Papa Sylvest Mirliton Variety Background
I learned of a large mirliton farm in Cut Off, Louisiana, in 2009 and traveled there to meet its owner, Vivian Danos Arceneaux. I learned it had been grown for decades and after examining the variety, I told her I wanted to give it a name to help preserve and popularize it. Miss Vivian decided on the name “Papa Sylvest” in honor of her father, Sylvester Antoine Danos, Sr (1901-1998), who planted the first seed at their farm.
Miss Vivian is a mirliton grower extraordinaire. She had grown mirlitons for more than 60 years and had hundreds of feet of trellis and an advanced drainage system. She willingly shared her vast knowledge of the art of mirliton growing with me and donated several dozen Papa Sylvest sprouts to Mirliton.Org for other growers.
Miss Vivian retired from farming but is still alive and active in 2024 at the age of 97 years old in Lafourche Parish. Her nephew, Alvin “Butch” Orgeron, has kept the variety going with his enormous trellis in Thibodaux and is responsible for almost all the Papa Sylvest vines you see today in Louisiana.

Miss Vivian on her porch on the farm, 2010

Papa Sylvest Trellis
Grow Your Mirliton Anywhere Using a Grow Bag
Mitchell Thomas had poor soil that does not drain well–and that’s bad news for mirlitons whose roots need to breathe. So, he developed a method of growing them in fabric “grow bags.” He and others have gotten small crops with this technique. It enables you to grow mirlitons even if you don’t have a yard: on patios, driveways, and balconies!
If you have drainage problems or no garden space–or need to relocate your vine to some shade, grow bags may be a solution.
If you want to learn how go to the Mirliton.Org Facebook group and post a question.
Cool-Season Mirliton Growing
 We have a problem.
Anyone growing mirlitons for the past few years knows that if the heat waves don’t get your vines, the hurricanes will. The weather has changed, and the forecast is that it will only get worse- more heat waves and hurricanes.
But we have a solution. We have the perfect six-month season free of heat and hurricanes: November through April. Why not take advantage of it? It’s possible for you to get three crops in those six cool months: fall, winter, and spring!
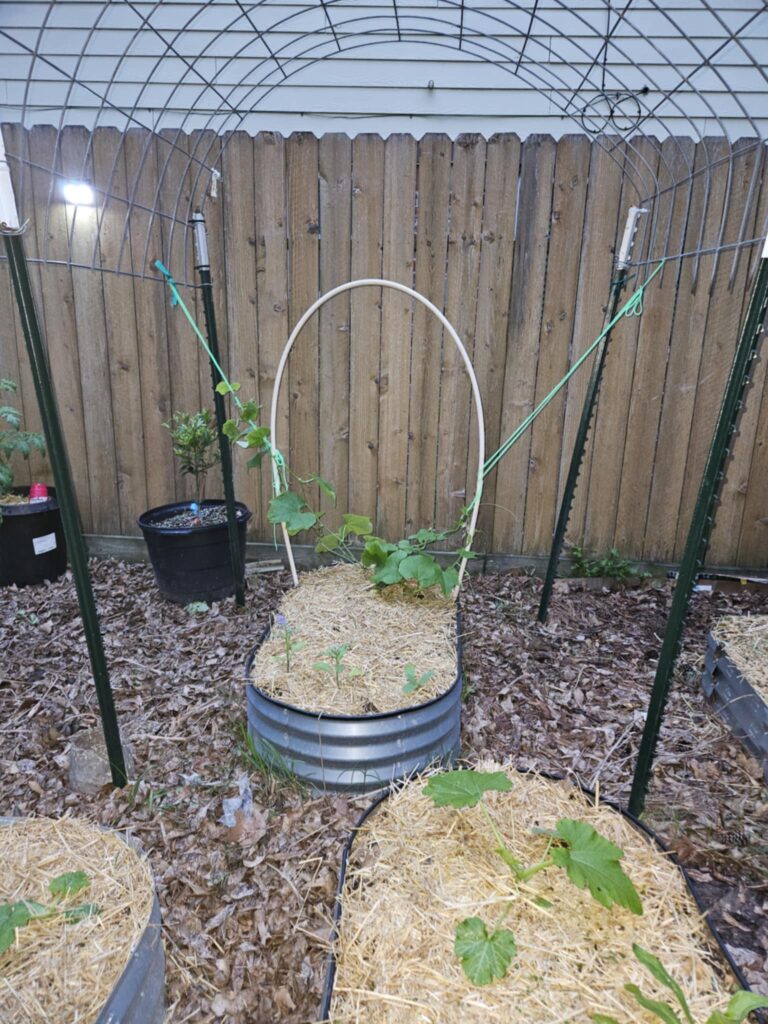
You can plant your sprouts in the fall and let them grow on a small trellis throughout the winter. You can easily protect it from those few frost/freeze nights by temporarily tenting it with a tarp or plastic and adding a heating element. It’s additional work, but you will get a spring crop and head into the summer with a healthy vine with a good root structure. A strong, mature vine like that can make it through summer heat domes and you may even get a second fall crop.
Cool, ain’t it?
You don’t need anything fancy to cool-season grow mirlitons. Just a tarp or plastic to throw over the vine and a small space heater to keep the temperature inside the enclosure above 32℉. I use an inexpensive remote thermometer to monitor the temperature. If you use clear plastic, you can leave the enclosure up all winter and open up the sides on warm days to allow pollinators to access the vine.
As always, you will need a certified Louisiana heirloom mirliton to ensure success.
Even if you don’t attempt to grow year-round, the cool-season method will help you extend the fall season well beyond the normal frost date.
Here are the tools I use for cool-season planting:
Tarp or 6-mil plastic sheeting
Portable Heater (electric, propane, or heat lamp)
Wireless Remote Thermometer (click to view)

Michelle Glore inside her tented vine after the 2025 deep freeze and 10″ of snow.

Michelle Glore’s trellised and tented vine in the 2025 blizzard
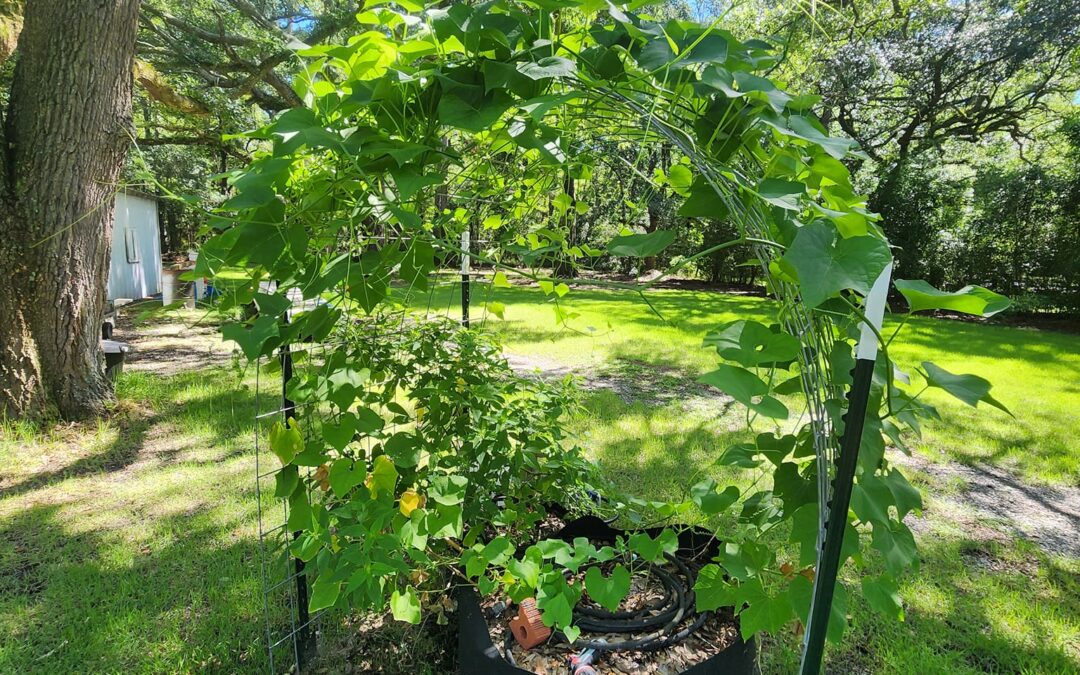
Michelle’s winter mirliton crop is ready to harvest in early April.
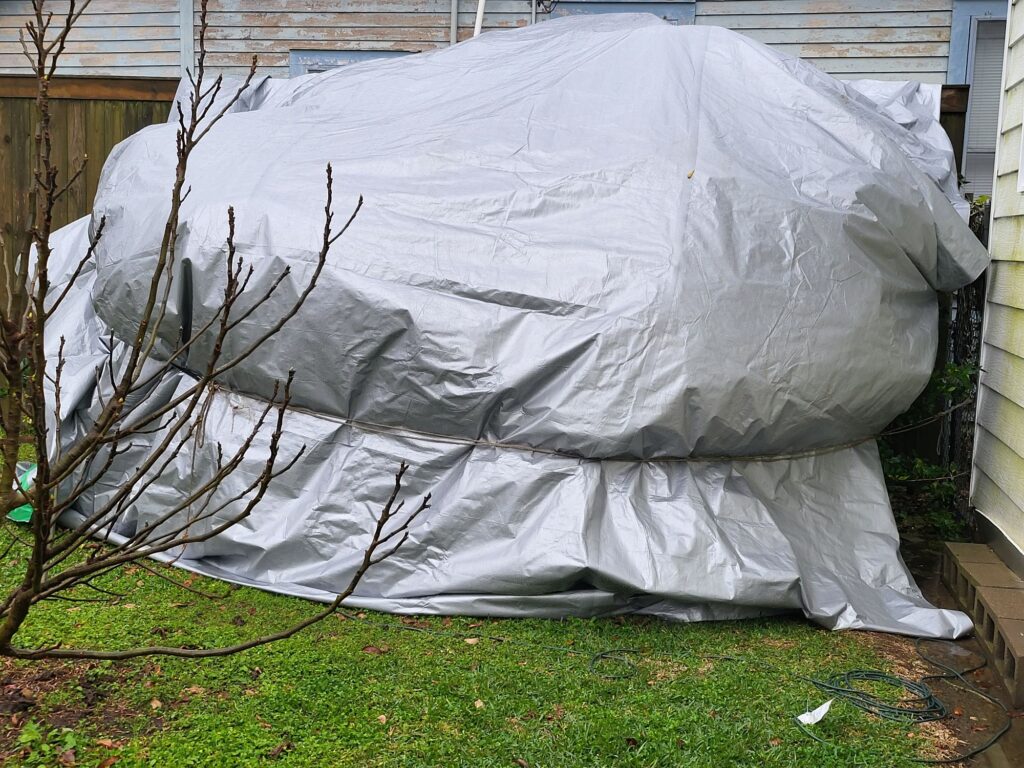
Melissa Minevielle’s tented vine with a heater.

Deb Sepulveda’s tented vine before the freeze.
How to Plant a Spring Sprout to Prepare for a Fall Planting
Here’s a proven method of planting a spring sprout that you got too late for ground planting. Homer Baham told us about this simple method of container planting the mirliton for the summer and transplanting it into the ground in the fall. Then he mulches it for the winter and it comes back and produces a spring crop. Here’s what Homer writes:
“I have successfully done this many times, including last year after losing my 6-year-old vines in the heat dome. You should plant the sprouts in two-gallon pots and let them root and grow in the pots throughout the summer (they can be pruned back if necessary). After the 1st of September when the worst of the summer heat is over, plant them into a prepared raised bed garden or your garden. After they get over the transplant shock (1 to 2 weeks), they will start growing.
Feed them weekly with water-soluble miracle grow. Let them grow and vine wherever they will (you can use a tomato cage if necessary). They should show prolific growth. You will not get a fall crop but may see flowering. This allows the plants to establish a good root system. Before the first predicted fall frost, cut them back to 4 to 6 inches and cover them with 12-14 inches of leaves. ( I put an inverted plastic flower pot over them so I can find them later without damaging them).
In January when we start getting warm days, uncover them and expose them to the sun and warm weather. Water them and feed them with Miracle-Gro. Be prepared to cover them back up in the event of frost or freeze but leave them exposed as long as no frost or freeze. You should see growth very soon. Let them vine and grow, caring for them as normal with regular feedings and adequate water. Stop feeding the plant in April and you see them flowering and setting fruit by May.
I have never missed getting some spring crop when I follow this procedure!”