by Lance Hill | Apr 9, 2023 | How To, Mirliton
Mirliton is the name people gave the chayote (Sechuim edule) when it first arrived in Louisiana. Chayote is the main species and there are many subspecies (subvarieties) around the world with different names. They are what botanists call a “landrace.” Landraces are domesticated plants that developed over time and adapted to their natural environment and are not the product of human manipulation–such as plant breeding or modern genetic science. Haitians brought the first mirlitons to Louisiana over two centuries ago and that landrace thrived because it was adapted to our altitude, climate, pests, and diseases.
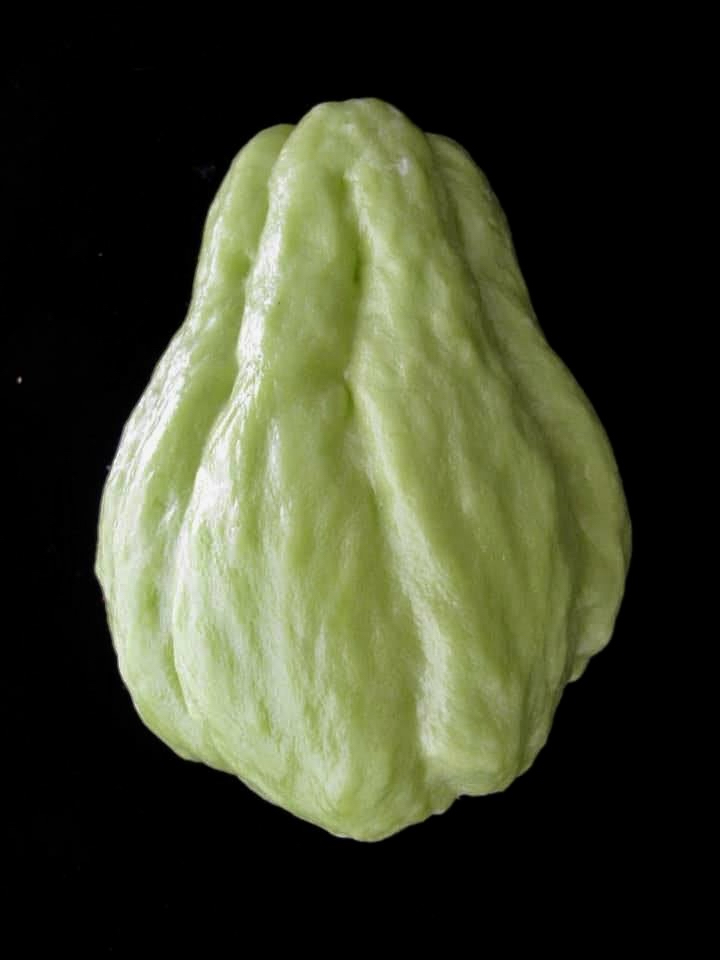
Since the Louisiana variety has never been analyzed genetically, we have had to use the fruit appearance to classify it and its subvarieties. The Louisiana mirliton landrace has distinctive fruit traits (morphology); they are large, slightly pear or egg-shaped, with smooth skin, longitudinal furrows (though a few may be unfurrowed), and either green or white. Over the years other varieties were probably introduced from Mexico and Central America and interbred with the Louisiana landrace. The resulting landrace was what generations of Lousianians simply called “mirlitons.” And for most of the last two centuries, there was only one variety.
Then things changed. Hurricane Katrina wiped out almost all the mirlitons in New Orleans, so I began to search for growers of our Louisiana landrace to replace the New Orleans ones. I eventually found many growers in rural areas and when I did, I would name the mirliton after the grower so that we could track and preserve it.
I soon noticed differences within Louisiana mirlitons–there were clearly different subvarieties in the landrace. Mirlitons were more complex than we thought. I decided to classify the subvarieties by fruit morphology and then interview the growers to determine the strain’s history. If it were a unique variety, we would name the variety so we could track and preserve it. That’s how “named varieties” came to be.
We have reached the point in 2024 where we have identified most of the Louisiana subspecies. To simplify matters, from this point forward, we will classify mirlitons into three categories for purposes of discussion on our Mirliton.Org Facebook group:
- Certified Heirloom Mirliton: A variety that was submitted to Mirliton.Org for visual review and met all the heirloom criteria. Anyone can submit photographs of their variety for review at no cost. If we certify it, you can say on the Mirliton.Org Facebook group that you are growing a “certified heirloom mirliton.” Submit photos to lance@mirliton.org or at the Mirliton.Org Facebook group. We maintain a public list of all certified heirlooms that you can refer people to verify that you are growing a certified variety.
- Certified Named Heirloom Mirliton: These are varieties that were submitted to Mirliton.org in the past that met all the requirements and were sufficiently unique that Mirliton.Org named them for tracking and preservation purposes.
- Louisiana Heirloom Mirliton: These are the varieties grown along the Gulf Coast south that were obtained from an unknown source (a local farmer, a seed store, etc.), and the grower sincerely believes they are Louisiana heirlooms. If you are growing one of these uncertified varieties, you can simply say it’s an “heirloom mirliton” or “Louisiana heirloom.”
There are currently 14 Certified Named Heirloom Varieties:
Ervin Crawford
Ishreal Thibodeaux
Boudreaux-Robert
Blacklege
Papa Sylvest
Bogalusa whites
Chauvin-Rister
Miss Clara
Remondet-Perque
Joseph Boudreaux
Bebe Leblanc
Maurin
Jody Coyne
Dupuy-Prejean
Why is it important to continue tracking heirlooms? Beginning in 2020, several large grocery store chains began importing chayote (mirlitons) that looked exactly like our heirloom varieties. People began buying them, using them as seeds, and growing mirlitons indistinguishable from our heirloom varieties. The problem is that imported chayote may carry a seed-transmissible virus that can destroy our heirlooms. It’s called Chayote Mosaic Virus (ChMv), which devastated crops in other countries. Recent research has also discovered new strains of anthracnose in Brazilian chayote that can be transmitted inside the fruit.
We created the certification process to help preserve and popularize the Louisiana heirloom variety. We recommend that the best way to accomplish this is to use only certified heirloom seeds.
by Lance Hill | Apr 1, 2023 | How To, Mirliton
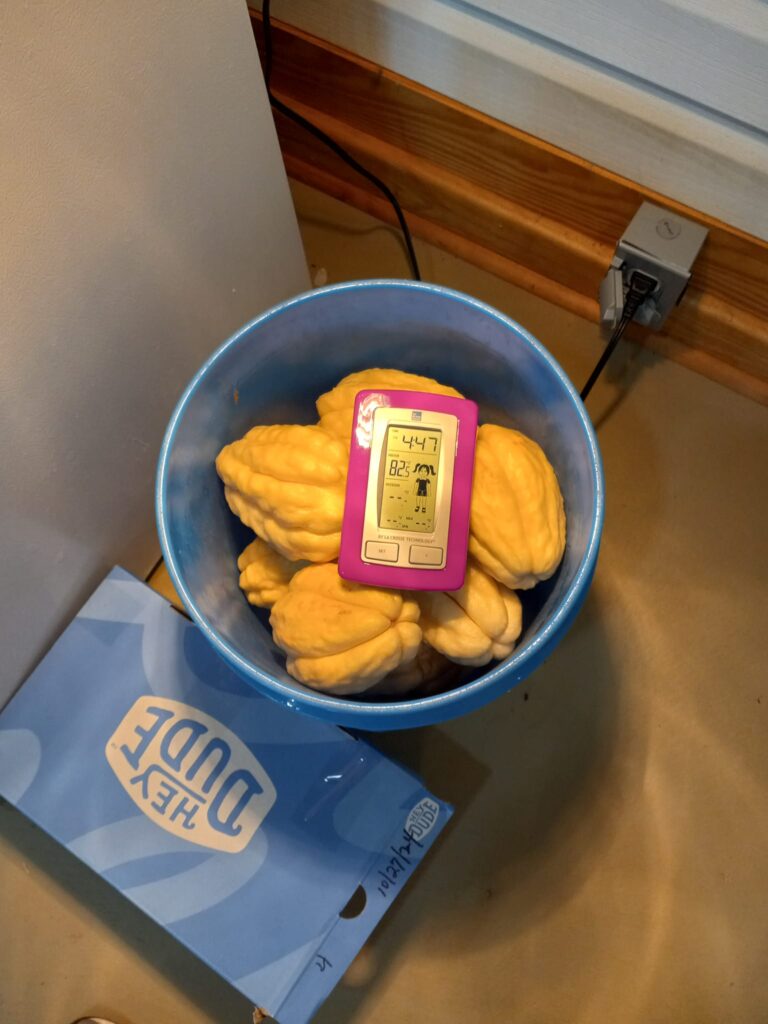
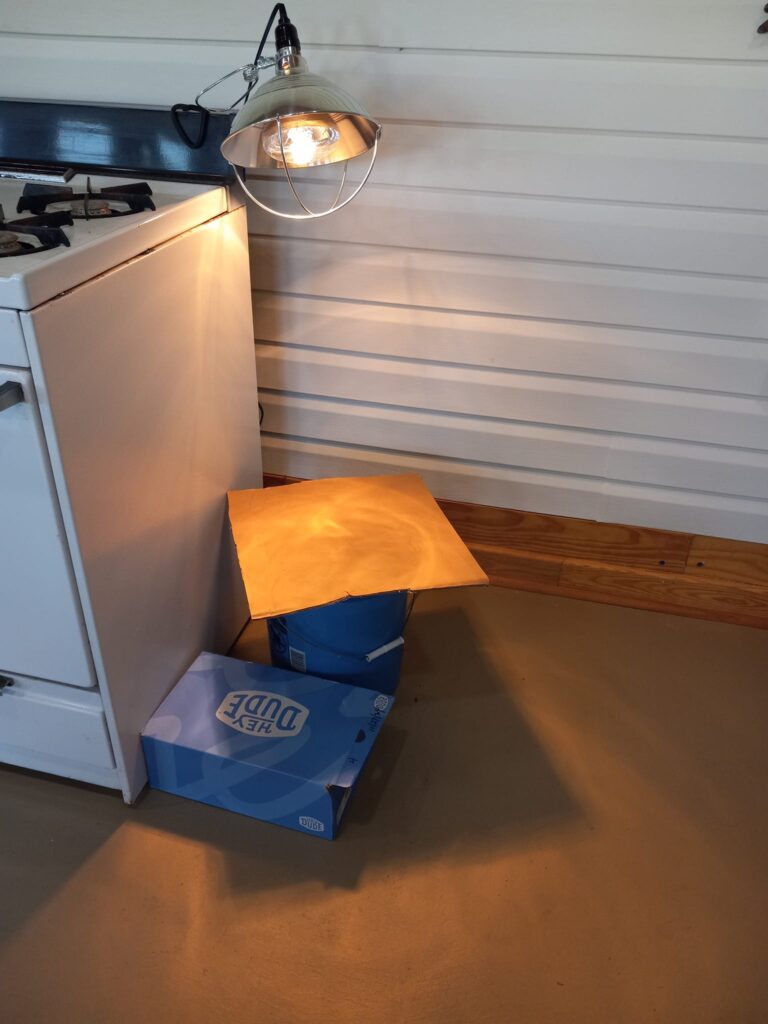
Angela Joan incubated her mirlitons in a 5-gallon bucket with a 125w heat lamp above. They sprouted in 11 days.
Growers normally try to delay mirliton sprouting by putting new fruit in paper bags and storing them in a cool part of the house. Cool temperatures promote dormancy and prevent sprouting. But you may want to promote quick sprouting so you can plant them immediately in the ground or container, especially if you want to plant them in the fall. Here’s an “incubation” trick that Joseph Boudreaux of Broussard taught me that speeds up sprouting.
You can incubate them inside your home in the fall or winter using a small plastic trash can with a heating pad underneath. Place the mirlitons in a 5-gallon bucket and loosely cover the top with some cardboard. Place a thermometer next to the mirlitons and adjust the heating pad to maintain the can temperature at 80°-85°. You can also use an overhead heat lamp as in the photos. When kept warm like this, the fruit will normally begin to sprout within 10-14 days. Sprouting is defined as when the internal seed pushes its way to the large end of the seed (“sticks its tongue out) and a small green shoot emerges. Here is how I did it with a trash can.
Angela covered the bucket with cardboard and used a remote thermometer and kept it at 85 degrees.
If the outside temperatures are in the 90s, you can do this outside in a cardboard box without a heating pad. Once you pick the fruit, place it in a shaded warm area with a constant temperature of at least 75-80°F to encourage sprouting. If storing them outside, use chicken wire or netting to protect the seed from pests that enjoy eating the new sprouts.
Once a mirliton sprouts, it means the seed is viable and can be planted. It’s important not to distribute or sell the seed until it has sprouted because sometimes—especially with Spring mirlitons—the seed can look healthy but have no internal inner seed and will not sprout and grow a new vine (it’s called parthenocarpy).
by Lance Hill | Mar 28, 2023 | How To, Mirliton
There has never been a scientific study for home gardeners on how to best fertilize mirlitons, so we get to invent the science ourselves. In the growers guide that I wrote several years ago, I recommended 8-24-24 fertilizer. I don’t advocate that specific one anymore. Any fertilizer with a lower percentage of nitrogen (the first number), such as 5-20-20, will work fine, and old-fashioned 8-8-8 or Miracle-gro are good choices. A couple of tablespoons at planting and again in July is sufficient—as long as the vine is vigorously growing and green.
But there are two important fertilizing principles I have learned from experienced growers:
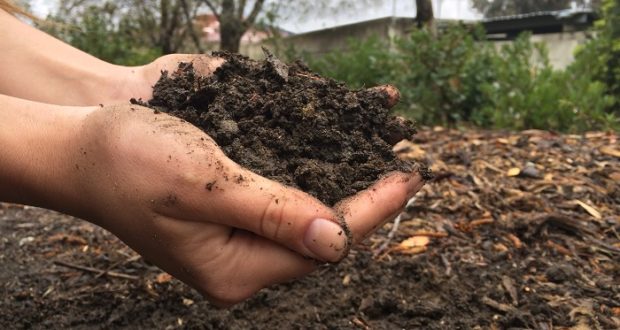
(1) Use a slow-release fertilizer such as manure. A mirliton’s nitrogen needs vary throughout the growing season. You don’t want to jolt their tender young roots when you first plant them. They like a buffet where they can eat light but return for more help when they need it. Manure provides that. Ideally, work into your soil or planting pit before you plant, but you can side-dress throughout the season. Rabbit manure is the best choice, but any manure will do the job.
(2) If you are using fast-release fertilizers, stop fertilizing in July before the flowering season. A dose of fertilizer can delay and disrupt flowering.
I asked our home gardener mirliton scientists last year to tell us how they fertilized mirlitons. What were the signs it was helping or hurting? Did the experiment with different techniques? I got these thoughtful responses. Click here to read them.
by Lance Hill | Mar 6, 2023 | How To, Mirliton

Excessive rains and prolonged droughts make it nearly impossible to know if we have the right soil moisture for mirlitons. Extremes in soil moisture–too much or too little–can stress the plant and cause diseases. Mirliton growers in Brazil long ago took the guesswork out of determining exactly how much available moisture lies below the surface. They use an inexpensive “soil sampler” which allows them to take a core sample of their gardens/fields and see and touch the soil at all levels. You can’t beat that.
.
You can buy a small soil sampler for less than $20, or if you are like me and have an old worn-out back, you can get a 36” one with a footstep. Once you pull up a core, you can pop it out onto a table touch the soil at each level and to feel for moisture levels. A mirliton’s primary root zone is in the top 7” of soil, so no more drowning or dehydrating your plants. Watch this clip on how easy it is to use.
Buy the 12” one here
Buy the 36″ one here
Here’s a short video on how to use the “sight and touch” method for the core sample you take.

by Lance Hill | Feb 25, 2023 | How To, Mirliton
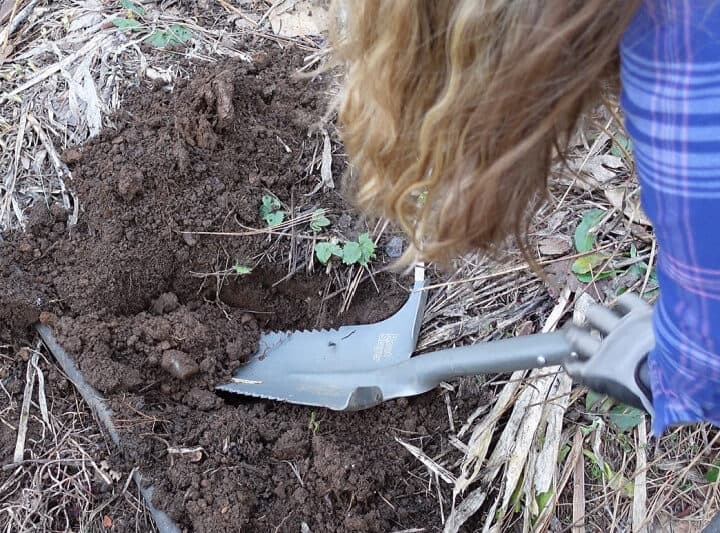
- Select a plant site. The most important thing to keep in mind is that water-saturated soil can drown a young mirliton. Even if your plant survives intense rains, excessive soil moisture later in the summer will stress the plant leading to anthracnose. Choose the best well-drained site on your property–away from roof run-off and preferably near a tree drip line. The vine does not have to initially be in full sun because mirlitons are sun-seekers and will follow a trellis to available sunlight. Make sure you have room for an overhead or vertical trellis.
- Make a bed or a pit. Mirlitons thrive in loamy, well-drained soil. If you have that, prepare a bed at least 10′ x 10′ which will allow for an overhead trellis that can double as an enclosure for frost protection. Till the soil and add amendments if necessary (if you are using a raised bed, tilling the soil beneath is imperative to ensure bed drainage). But most growers are not fortunate to have good soil and certainly don’t want to waste a $10 seed on a $1 hole. In that case, I recommend a planting technique taught to me by Ishreal Thibodeaux of Opelousas: the pit method. It has been successfully used around the world wherever gardeners have clay or any poor soils. With this pit method, you are essentially building a container below ground and filling it with your preferred soil mixture, just as you would with house plants. First, dig a pit 2’ x 2’ x 18” deep. Then fill it with a mix of equal parts: (1) the topsoil you removed from the hole, (2) commercial potting soil, (3) compost, and (4) manure (rabbit, if available). Make enough mixture to also build the hill on top (below).
- Build a hill. Make a 2’ x 2’ hill on top of the pit using the same mix. Transplant your mirliton into that in April or after the normal last frost date and add a wire cylinder trellis so the vine can climb to the overhead trellis.
- Assemble your defense force. Prepare now for rain, pests, and diseases. We suggest you buy a: (1) rain gauge, (2) a soil sampler for testing soil moisture (3) potassium bicarbonate for powdery mildew, (4) BT for preventative management of vine borers, (5) sevin for preventative management of stink bugs, and (6) a shade cloth for the first two months of the plant.
Links:
Soil Sampler for Testing Soil Moisture
Potassium bicarbonate
BT Concentrate
Sevin
by Lance Hill | Jan 25, 2023 | How To, Mirliton
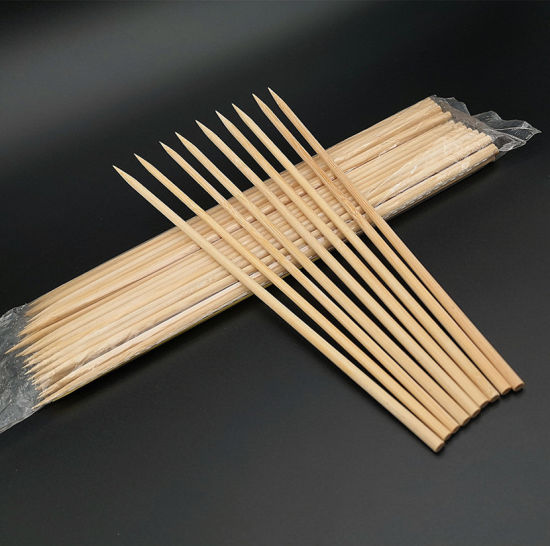
The video at the bottom of this post explains in 60 seconds the simple bamboo skewer stick soil moisture technique that will prevent you from drowning your young mirliton.
If you get a mirliton sprout and it’s too early to ground-plant it, we recommend that you plant it in a 3-5 gallon container or grow bag filled with potting soil. It can remain in the container for more than a year and can be pruned back if necessary. Watering is the main problem you may encounter. The mirliton needs very little water the first several weeks because it comes with its own water source–the fruit. You should initially thoroughly water it and leave it alone for some time so you don’t drown the roots. The only way the container will lose water is through evapotranspiration—by natural evaporation of the soil and loss of small amounts of water through the leaves (transpiration).
The best way to check the soil moisture is the bamboo skewer stick test. It works better than any expensive electronic tester. Insert and withdraw the skewer quickly and visually examine it. It will provide you with a graduated reading–each particle of soil represents the available moisture at that specific level. The bottom of the stake will show the moisture at the deepest level. If a few soil particles adhere to the skewer, that means they are moist, which means you have good soil moisture. If it comes out clean and dry, it needs water. If it comes out smeared and muddy, that’s too much moisture. After visually examining it, run the skewer between two fingers to feel the moisture at the different levels. You will develop a good sense of when it’s not drenched or dehydrated.
The “appearance and touch” method is similar to the one that soil labs to assess clay content for a soil sample–they roll the soil between their fingers and use their senses to judge the clay content.
Then leave the stick out to dry for the next test.
When you move the plant outside, it may lose moisture and need to me monitored more regularly. Here’s the quick and simple video: bit.ly/3w6vJ8o
In addition, you can use the skewers to help peel the mirliton! View the 60-second tutorial here.
Recent Comments